Welcome 2014!! And, Happy New Year to all who venture here.
Last year we decided to have a craft studio house addition built. Everything started out smoothly but what should have been completed by the end of three months turned into a six month adventure. We finally finished the addition at the start of the New Year. I am more than delighted to have a large craft studio where all my tools and materials are in view. The addition actually has two rooms. One for me and one for my husband, where he will be setting up his laser engraving projects.
November and December we were busy with holiday preparations and family gatherings, moving into my new space, cleaning out the old stuff and preparing for the new projects, so I really did not have anything newsworthy to post.
So, in this first post of the new year, I would like to share pictures of this new craft studio with some before and after photos.
 |
| My old craft space was a 9' x 12' extra bedroom in the main house. |
 |
| In addition to the crafts, I also had a small office space. |
 |
| And a closet full of supplies. |
...........................DRUM ROLL, PLEASE................................
 |
| I can enter my studio from the garage side of the house. At the time this picture was taken I did not have my thread cabinet, which is now against the wall behind my embroidery machine. |
 |
| Plenty of light with two windows. I still need to make some nice curtains, or buy window shades, but for now I am enjoying all the sunlight. |
 |
| In the center of the room I have a fabric cutting table with plenty of storage underneath and pegboard on both sides where I can hang supplies. In the corner (out of view) is my little office space and against the wall is my short-arm quilting set-up. |
 |
| On the opposite wall are cabinets for more supplies, beading and paper crafts, material storage. As you can see, most of my furnishings can be rolled to open up a little more space if needed. I now have a very spacious 18' x 18' work studio. |
 |
| And, here is my thread cabinet in place. |
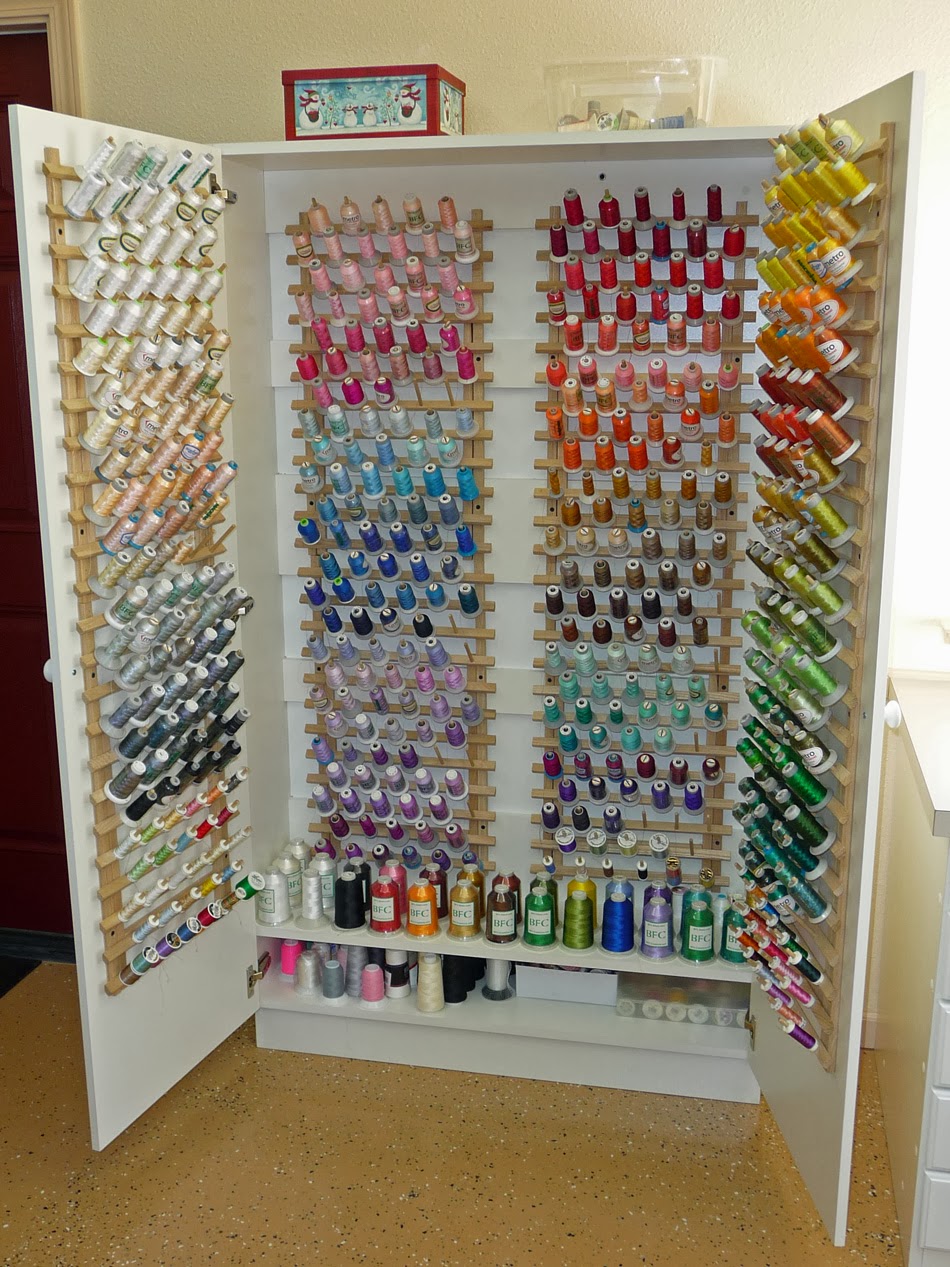 |
| Ta Da!!! Just look at this color and storage. Now I don't have to dig through bins and tangled threads. |
 |
| A little closer view of my fabric cutting table. |
 |
| A view from the other side. |
My work table with drawers on either side, the fabric cutting and storage table, and the thread cabinet were custom made by Top Shelf Woodwork, in Sutter Creek, California. I like the clean style and quality workmanship. Here is the link to their Facebook page: Top Shelf Woodwork.
Now that I have a nice room, I decided to make something pretty for myself. During my purge as I moved into my new space, I threw out pincushions that were over 40 years old and a little more than thread bare. Here is a Biscornu I made to get the creative grey matter working.
 |
| Embroidery design is from Artistic Designs available through Oregon Patchworks Mall. My husband did the plaque in the background as a practice piece with his laser machine. |
Now I have lots of wall space where I can showcase some of my projects as they are completed.
With a new year comes new goals and projects.

6 comments:
where did you get the thread cabinet
Love the thread cabinet. Please let me know where I can purchase one
It has been a while since I've done anything with the blog due to several life's changes. I am ever hopeful that I will be able to return in the near future.
Some viewers to my page were interested in the thread cabinet.....it is custom made with several of the June Taylor thread racks mounted on the interior. I think any good cabinet maker could look at the cabinet and understand how it was constructed.
I have an empty wardrobe closet that I think I'll make my thread cabinet. I'll paint the inside white and buy thread racks from Wish (great prices btw) and attach them inside. I am so happy that I have solved 2 problems with your idea. I now have a purpose for the closet and I can store my threads neatly. Thanks Jan!
Very nice, where did you get the stuff to insert the threads??
Thanks for sharing
Hello - Well, I guess people still do find this blog. Maybe this year I will get back to blogging now that I am re-settled in a new location - with a new workshop/studio and new endeavors in stitching. The thread inserts in the thread cabinet are the standard wall thread racks that can be purchased from a Joanns store or a local dealer or shop. The cabinet was custom made.
Post a Comment